

Step 1 - Installing the requirements
Until the download is over, make sure that you have Java installed and the 32-bit libraries (for the x86_64 users ONLY). If you don't have Java (or the 32-bit libraries), go to System -> Administration -> Synaptic Package Manager...
|
...search for openjdk and double-click on the openjdk-6-jre entry...
 |
...then, search for ia32-libs (ONLY if you are on a x86_64 machine), and double-click on the ia32-libs entry...
 |
Now, click the "Apply" button to install the packages. Wait for the packages to be installed and close Synaptic when the process is finished.
Step 2 - Android Setup
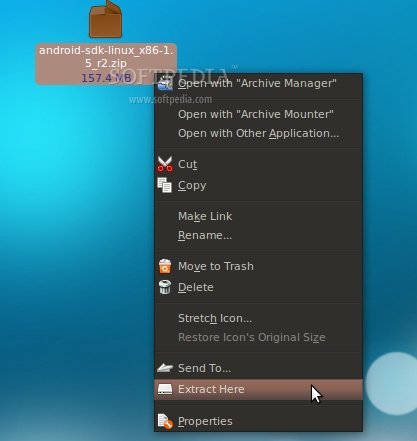
When the Android SDK download is over, right-click on the file and choose the "Extract Here..." option...
 |
Enter the extracted folder, then enter the tools folder and double click the android file. Click on the "Run" button when you will be asked what you want to do, and the Android SDK and AVD Manager interface will appear...
 |
Go to the "Settings" section and make sure you check the "Force https://..." box. Click the "Save & Apply" button....
 |
Now go to the "Installed Packages" section and click the "Update All" button. A window will appear with all the available updates. Click the "Install Accepted" button...
 |
...and wait for the packages to be downloaded and installed. It will take a while if you have a slow bandwidth, so go see a movie or something until it finishes...
 |
Close the update window when it's done and you will see all the installed SDKs in the "Installed Packages" section.
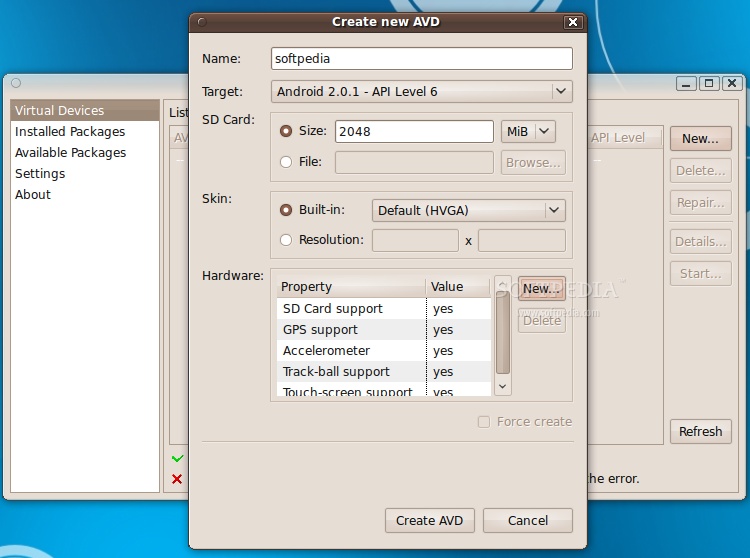
And now, let's create the virtual device. Go to the "Virtual Device" section and click the "New" button. In the new window do the following:
- put a name to the device;
- select a target (Android system);
- put the size for the SD Card;
- add the hardware you want have in the emulator.
It should look something like this...
 |
Click the "Create AVD" button when you're done setting up the virtual device and wait for it to finish. It takes about 1 minute, and you'll be notified by a pop-up...
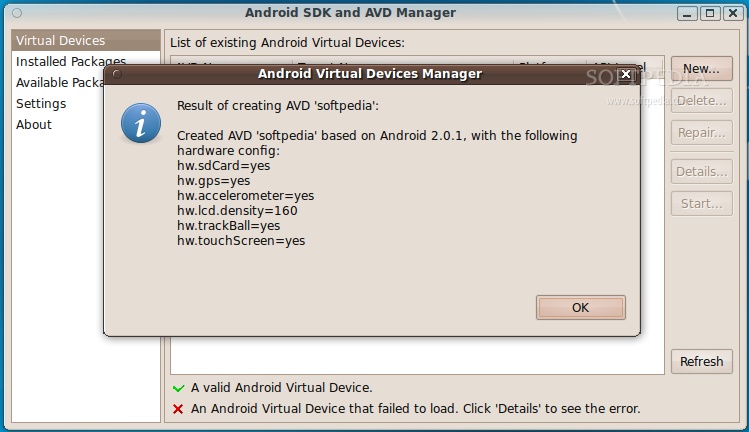 |
Note: In the above setup, we've created a virtual device for Android 2.0.1 with a 2 GB SD card and the following hardware components: SD Card, GPS, Accelerometer, Track-ball and touch-screen.
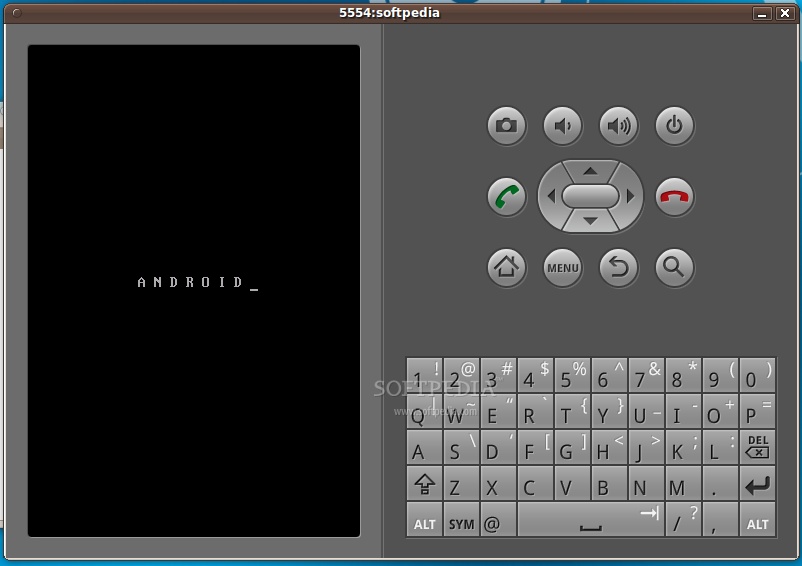
Now click the "Start" button, and the "Launch" button from the next dialog, and the emulator will start...
 |
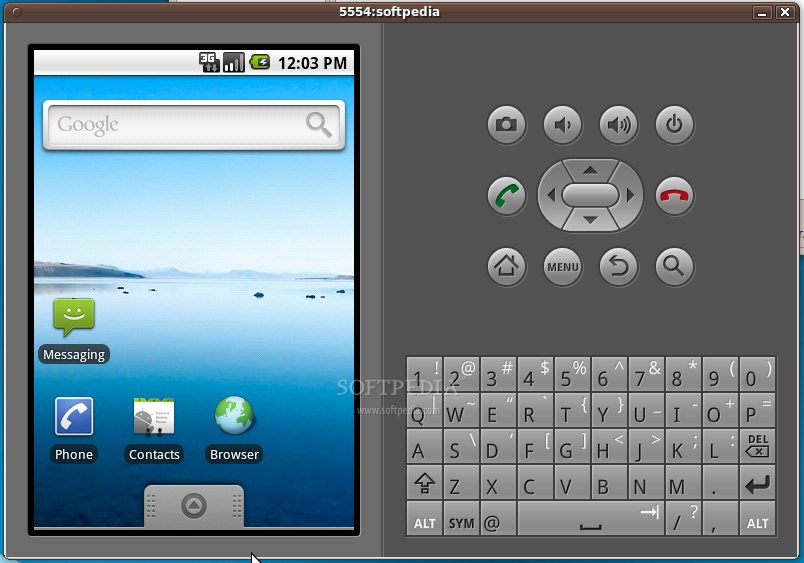 |
To make things a lot simpler let's create a desktop shortcut, so you won't have to open the terminal every time and type some command, in order to start the Android emulator. Therefore, right-click on your desktop and choose the "Create Launcher..." option...
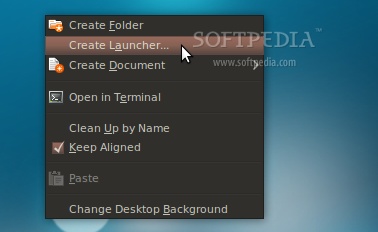 |
In the Create Launcher window, type "Android Emulator" (without quotes) in the Name field, and paste the below line in the Command field. Optionally, you can also put a nice icon if you click the icon button on the left...
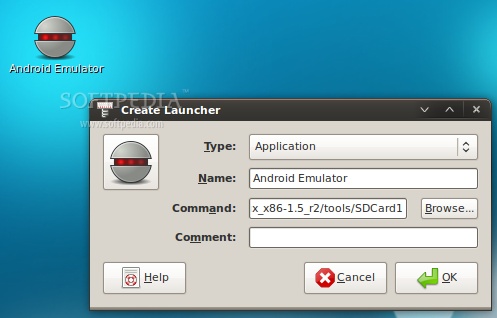 |
Step 3 - Run applications in Android
All you have to do now is double-click that desktop shortcut you've just created. The Android emulator will start. Wait for the operating system to load...
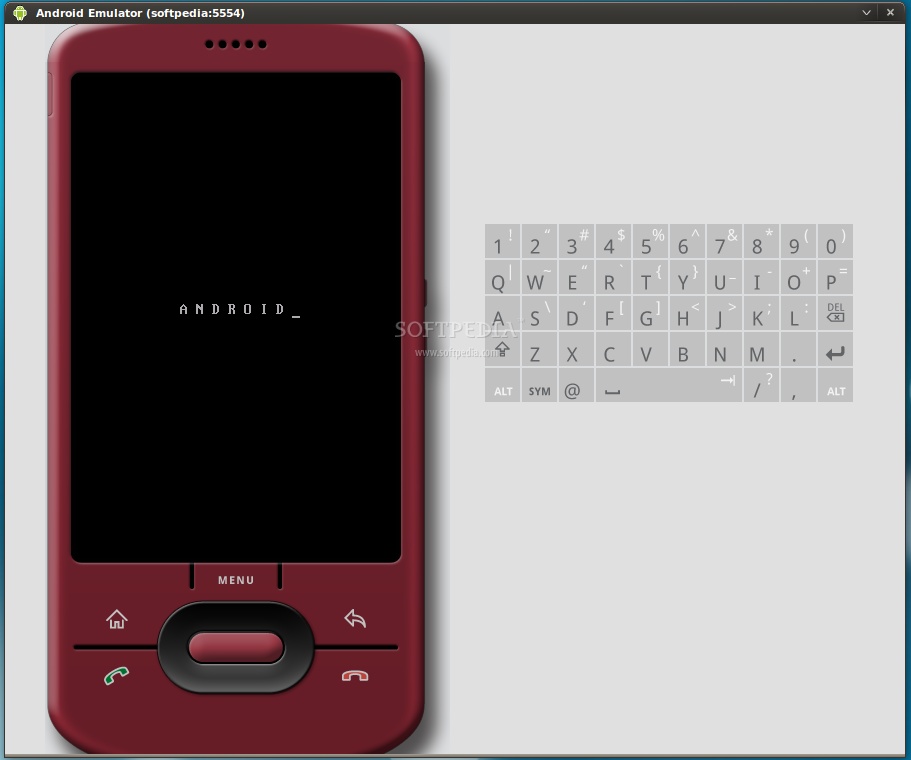 |
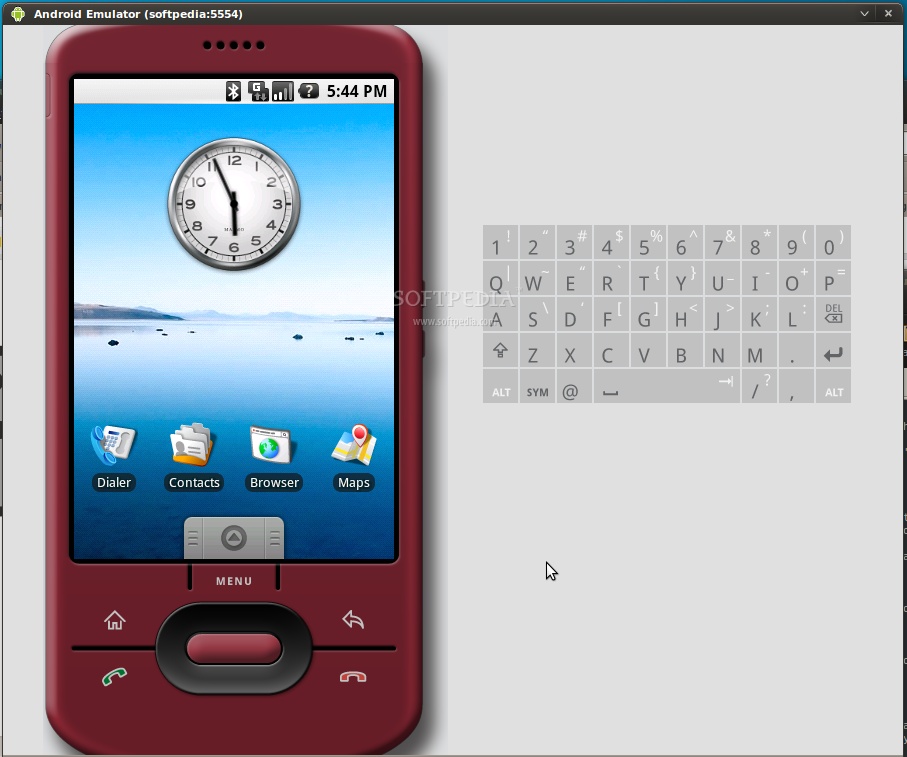
When the Android operating system has loaded, you can install and test applications. If you are used with the Android platform, you already know how to do that, but if this is your first time... follow the next instructions.
 |
| Android 1.1 |
 |
| Android 1.5 |
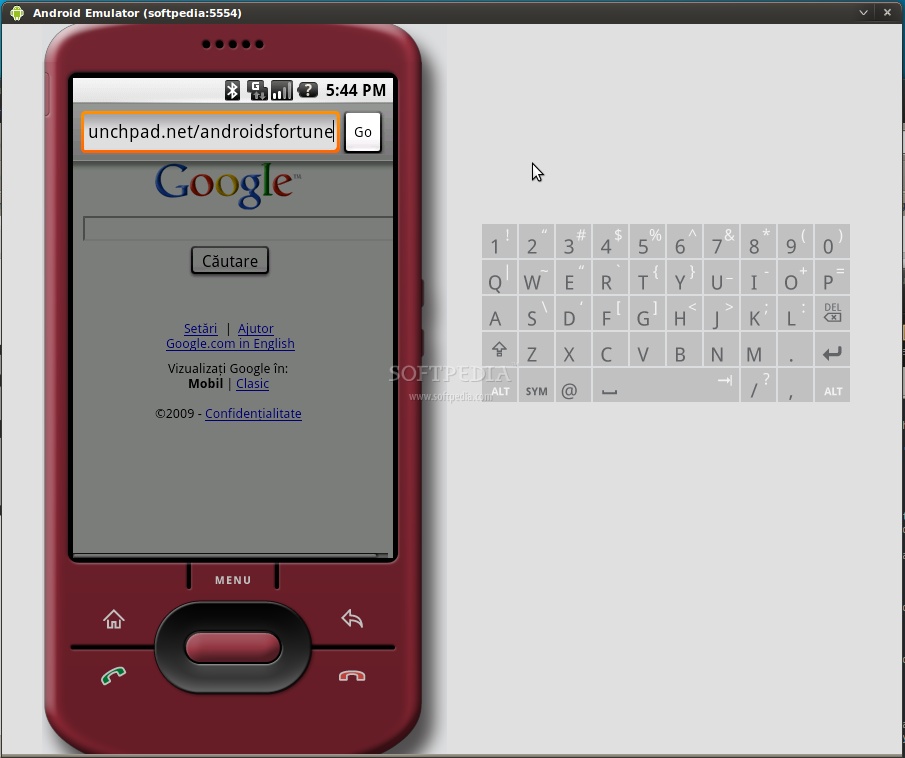
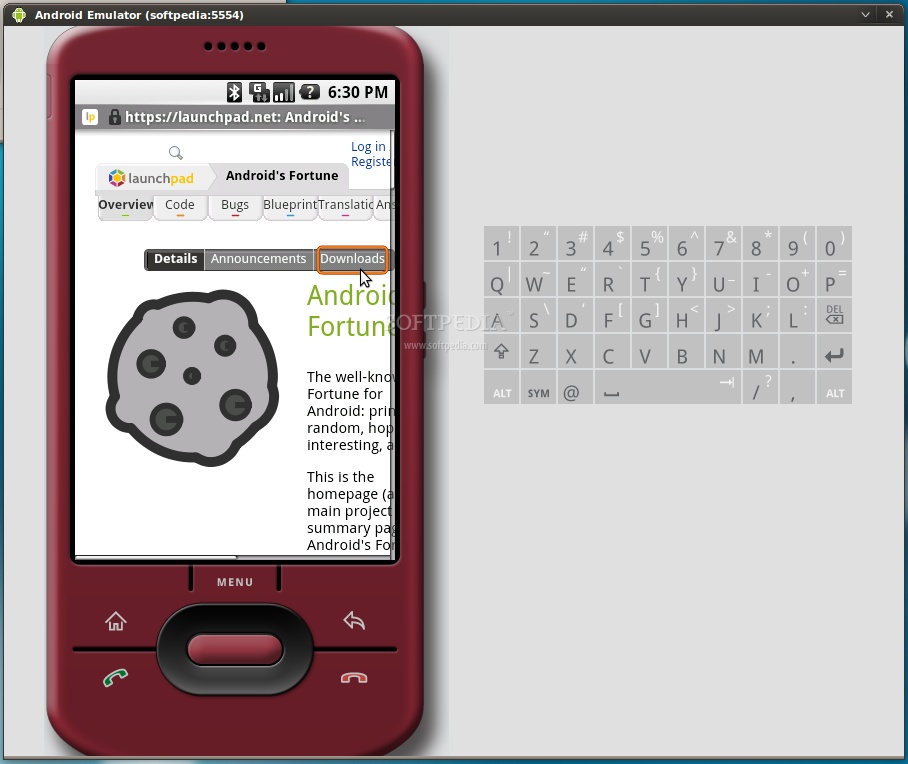
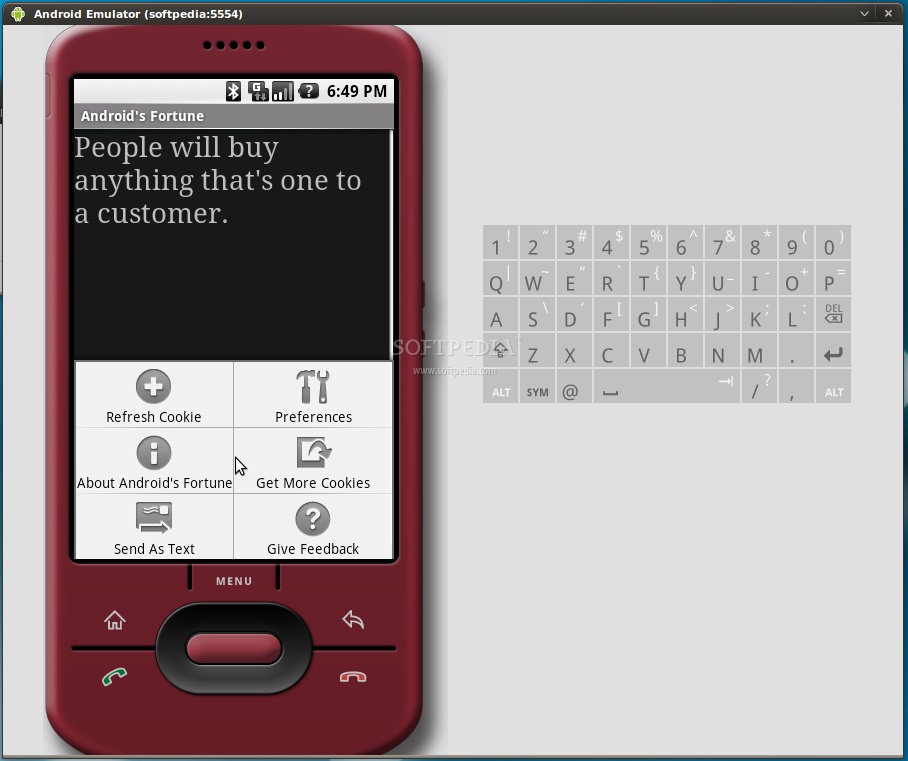
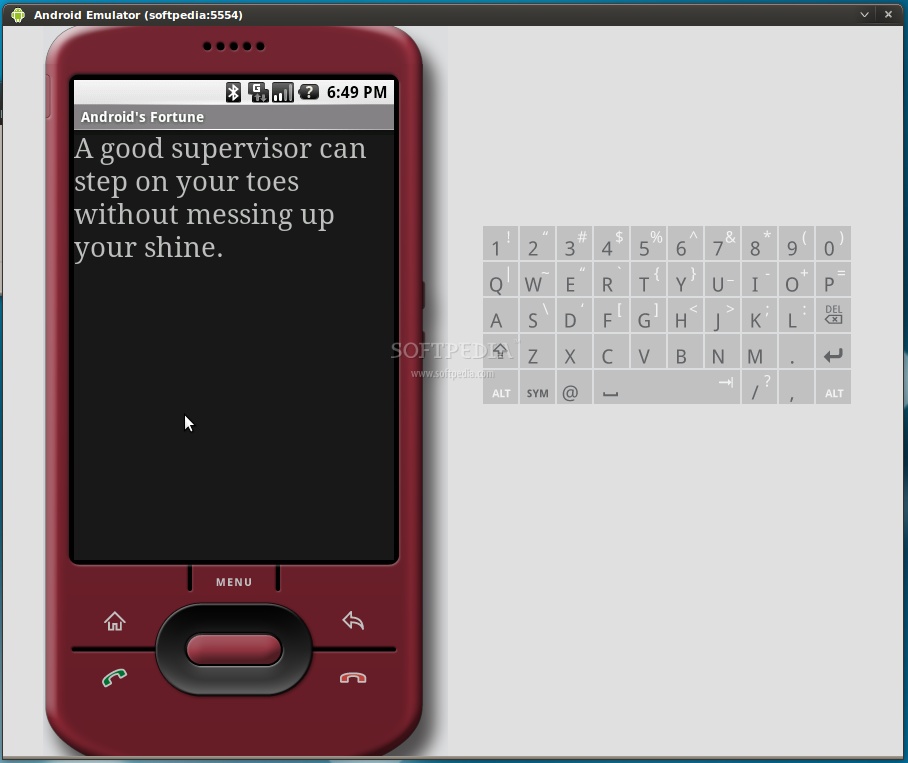
Click the Browser icon, wait for the browser to load and click Menu -> Go to URL. Enter the address from where you can download an Android application with the apk extension. For example, we've easily installed Android's Fortune from Launchpad...
 |
 |
 |
 |
 |
 |
 |
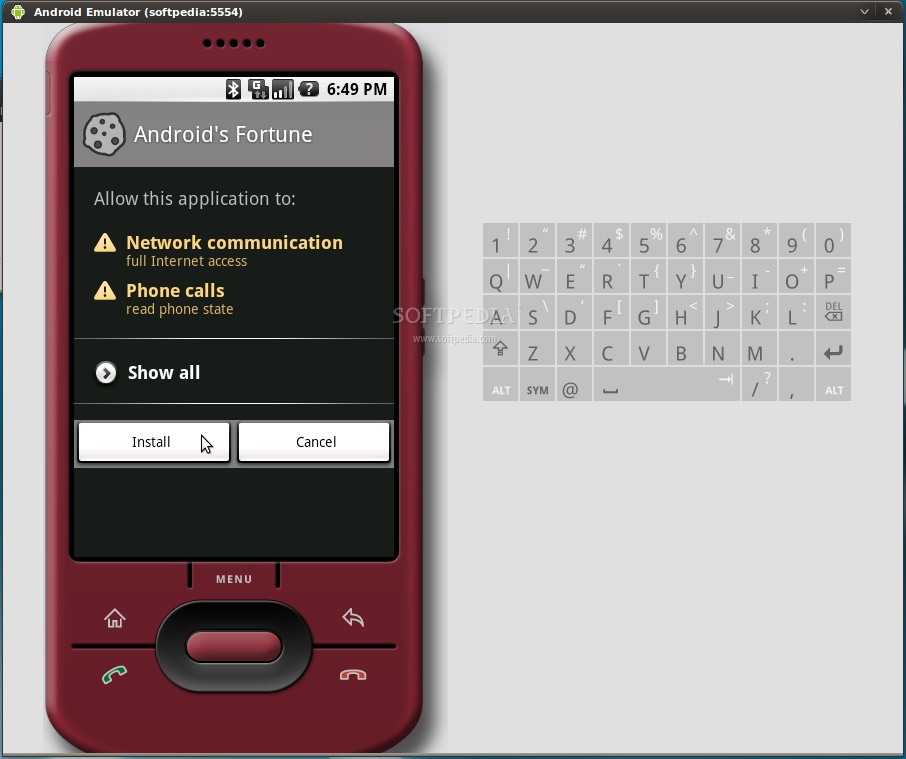
...all you have to do is follow the on-screen instructions!
Have fun, and do not hesitate to comment if you want to know more about Android, or if you're stuck somewhere in the tutorial.
No comments:
Post a Comment